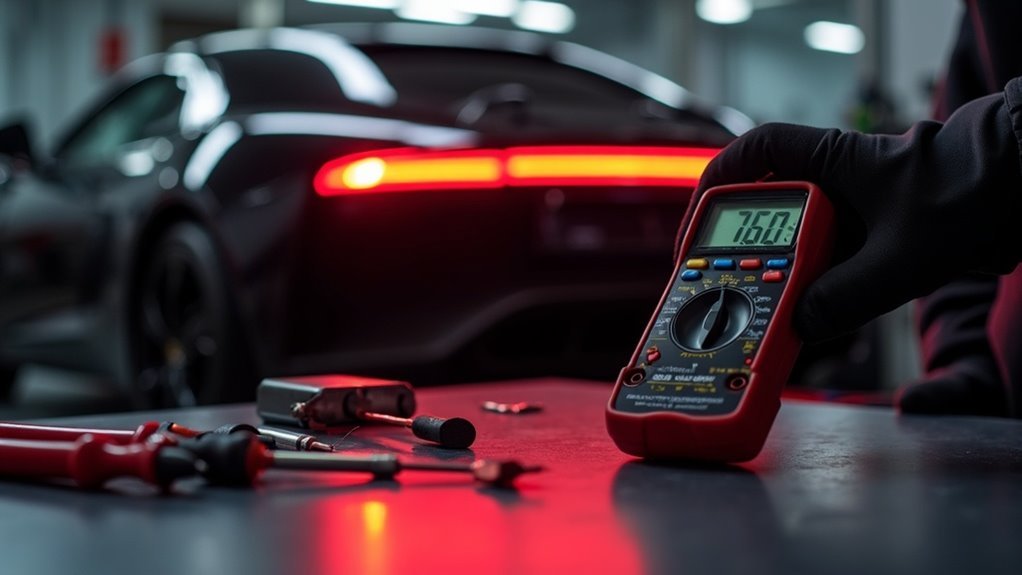
To safely test brake light sensors on your electric bicycle or scooter, begin by parking on a flat surface, turning off the power, and disconnecting the battery. Carefully inspect the wiring for any signs of damage before proceeding with a multimeter. Set the multimeter to measure voltage output and continuity. While pressing the brake lever, check for voltage output and ensure that the switch beeps or indicates low resistance. If there is no continuity detected, it may be necessary to replace the switch. Familiarizing yourself with specific troubleshooting steps can greatly improve your testing process.
Key Takeaways
- Park the electric bicycle or scooter on a flat surface, turn off the power, and disconnect the battery for safety before testing.
- Gather necessary tools such as a multimeter or test light, and consult the service manual for the brake switch location specific to your model.
- Measure voltage output while pulling the brake lever to check functionality and ensure the switch indicates continuity.
- Inspect wiring and connectors for visible damage or corrosion, as these can affect brake light sensor performance on your electric vehicle.
- Document any discrepancies found during testing and address issues promptly to maintain safety while riding.
Understanding Brake Light Sensors
Brake light sensors play an essential role in the safety of electric bicycles and scooters by ensuring that your brake lights function correctly when you engage the brakes.
These sensors, often referred to as brake light switches, are critical components in the braking system of these vehicles. In modern electric bikes and scooters, they can be electronic or mechanical, typically located near the brake levers.
A faulty switch may cause brake lights to remain on or fail to illuminate, impacting road safety. Regularly testing these sensors is crucial to diagnose a bad brake light switch, preventing dangerous riding conditions and ensuring compliance with safety regulations.
Importance of Functional Brake Lights
Functional brake lights are crucial for your safety and visibility when riding electric bicycles or scooters. They alert other road users when you’re slowing down or coming to a stop, helping to prevent accidents.
Inoperative brake lights can lead to traffic violations, making regular testing an important part of your routine maintenance. Ensuring that all components of your brake light system are functioning properly is essential for maintaining compliance with local laws and ensuring your safety while riding.
Safety and Visibility
When riding an electric bicycle or scooter, having fully operational brake lights is crucial for ensuring your safety and that of others on the road.
To enhance visibility and maintain road safety, consider the following:
- Check your brake lights regularly, ideally twice a year.
- Clean any dirt or moisture that may obstruct visibility.
- Address any malfunctioning brake light switches, as they can impact other vehicle functions.
- Always ensure your brake lights signal effectively to prevent accidents and uphold safety while riding.
Legal Compliance Requirements
Maintaining operational brake lights on electric bicycles and electric scooters isn’t just about safety; it also involves adhering to legal requirements.
Functional brake lights are essential for notifying other road users, reducing risks of collisions. In many jurisdictions, non-functional brake lights can lead to traffic citations, emphasizing the need for regular maintenance.
Most laws mandate that electric bicycles and scooters have at least one operational brake light to be considered roadworthy. Regularly testing your brake lights, especially before winter or long trips, ensures compliance with safety standards.
Neglecting this not only jeopardizes safety but can also lead to higher insurance premiums and liability in accidents.
Preliminary Steps Before Testing
Before you begin testing the brake light sensors on your electric bicycle or scooter, it’s crucial to ensure that the vehicle is parked on a flat surface and that the power is turned off to prevent accidental activation.
Follow these preliminary steps:
- Disconnect the battery to ensure safety while working on electrical components.
- Gather necessary tools, such as a multimeter or test light to check the brake light circuit.
- Consult the vehicle’s service manual to locate the brake switch and relevant testing procedures.
- Inspect the wiring and connectors for any visible damage or corrosion to ensure accurate results.
Using a Multimeter for Testing
To test the brake light sensors on electric bicycles or scooters effectively, you’ll need to set up your multimeter properly.
Start by measuring the voltage output to ensure power reaches the brake light switch.
Next, check the continuity to confirm that the switch operates correctly.
This systematic approach will help you identify any issues within the brake light sensor system of your electric ride, ensuring safety during your journeys.
Multimeter Setup Process
While ensuring your electric bicycle or scooter is safely parked and powered off, begin the multimeter setup process by selecting the appropriate setting on your device. Follow these steps:
- Disconnect the battery to guarantee safety.
- Set your multimeter to the continuity or resistance (ohms) setting.
- Connect the multimeter probes to the terminals of the brake light switch or the controller.
- Press the brake lever; a functional switch will indicate continuity (a beep or low resistance).
If there’s no continuity, the brake light switch or controller may be faulty and needs replacement.
Always prioritize safety during electrical tests.
Measuring Voltage Output
Measuring the voltage output of your electric bicycle or scooter’s brake light sensors is essential for diagnosing potential issues within the system.
First, ensure that the vehicle is stationary and the ignition is turned on to power the electrical system. Set your multimeter to the DC voltage setting, connecting the black probe to ground and the red probe to the brake light switch output terminal.
While pressing the brake lever, a functional switch should show a voltage between 12 to 14 volts. If you see no voltage, it indicates a faulty brake light switch or a wiring issue.
Always disconnect the battery before making any adjustments to prevent electrical shock.
Checking Continuity Functionality
Checking the continuity of your electric bicycle or scooter’s brake light sensor is a straightforward process that can help you identify malfunctioning components.
Follow these steps to effectively test the brake light switch:
- Ensure the vehicle is powered off and disconnect the negative terminal of the battery for safety.
- Set your multimeter to continuity test mode.
- Disconnect the wiring connector from the brake light sensor and place one probe on each terminal.
- Listen for a beep or check for a reading close to zero ohms; this indicates functionality.
If there’s no sound or infinite resistance, the switch is faulty.
Reconnect everything and perform a functional test of the brake lights to ensure they operate correctly.
Observing Brake Light Functionality
To ensure your electric bicycle or scooter’s brake lights are functioning properly, start by placing the vehicle on a flat surface and turning off the power.
If possible, have a friend stand behind the vehicle to observe the brake lights while you engage the brake lever. This will confirm that all lights illuminate as intended.
If you’re testing alone, use a mirror or reflective surface to check visibility. Regularly inspect both the left and right brake lights, as well as any rear signal lights.
Make sure the brake light switch is operational and check the wiring for any signs of wear or damage.
It’s a good practice to conduct these checks at least twice a year for optimal safety while riding.
Common Issues and Troubleshooting
While diagnosing electric bicycle or scooter brake light sensor issues, it’s essential to identify common problems that can hinder functionality.
Identifying common issues is crucial for diagnosing electric bicycle or scooter brake light sensor problems effectively.
Here are some frequent culprits:
- Faulty brake light sensor – This can lead to brake lights that remain on or fail to illuminate, impacting visibility and safety.
- Electrical wiring faults – Damaged or loose wires can disrupt the signal from the brake light switch, causing malfunction.
- Misaligned brake lever switches – These can prevent proper engagement with the sensor, affecting brake light operation.
- Inadequate testing – Always test continuity with a multimeter to ensure the sensor is functioning correctly.
Timely replacement of a defective brake light sensor is critical for the safety of the rider and compliance with traffic regulations.
Maintenance Tips for Brake Light Sensors
Maintaining the brake light sensors on electric bicycles and scooters is crucial for ensuring your safety and compliance while riding.
Regularly inspect the brake sensors for wear, dirt, or corrosion to prevent failures. Clean the electrical connectors and verify that they’re securely attached to avoid poor connections, which can lead to intermittent issues.
Use a multimeter to test the brake light’s continuity; it should activate when the brake lever is pulled. Address any early signs of malfunctioning brake lights promptly to prevent a faulty brake light switch from causing serious problems.
Schedule routine maintenance checks, particularly before long rides or seasonal changes, to ensure everything is in optimal working order.